So sorry for the delay in announcing the winner, dear readers. I've had family in town from the east coast.
Mama Rae - You are the winner of a $50 gift certificate to my Etsy store, Green Baboon Designs I'll be contacting you later today with instructions on redeeming your prize.
Congratulations!
Monday, February 28, 2011
Friday, February 25, 2011
This Moment - A Child's Work
{this moment} - A Friday ritual inspired by Soulemama A single photo - no words - capturing a moment from the week. A simple, special, extraordinary moment. A moment I want to pause, savor and remember.


Thursday, February 24, 2011
Settling in for more Winter
Remember how I've been talking about longing for spring?
It would seem that nature has other plans in store for me today. This is what we woke up to:

Of course The Boy had to pull on some warm clothes and dash outside to check on the chickens once he saw the white stuff covering the ground:

The girls are quite vocal this morning, not sure how they feel about the snow. They keep walking around with quite the quizzical looks on their faces.


Me? I just settled down to read my book that came just in time for breakfast. How cute is that thrifted teapot?:

Watching winter hang on,
Simple Mama
Wednesday, February 23, 2011

Tuesday, February 22, 2011
It's a New Day and a Giveaway!

First and foremost, I want to thank you all for your kind words from a few days ago. I was having one of those, "Wow...I really suck at this stay at home mama thing" moments. Your encouragement, support, words of wisdom and empathy were much needed and heard.
I'm relieved that I seem to be back on track. The Boy is feeling better. We made it through the, I'm-feeling-marginally-better-but-I'm-still-sick-enough-to be-cranky stage and we've moved onto the What-can-I-get-into/help with/mess up-now stage. The sink is cleared of dishes, there's laundry in the wash, and lunch is planned. The floor isn't swept, the beds aren't made (but they rarely are) and I think I forgot to feed the dog last night, but all in all the world has righted itself again.
Because you all have given so much to me over the past 2 years, I want to do something in return. I'm holding my 3rd giveaway. Up for grabs is a $50 gift certificate to my Etsy store, Green Baboon Designs. Shipping is on me. Please make sure I have a way to contact you either through your own blog, or leave your email address. Email addresses can be left as JaneDoe at gmail dot com so that spammers and the like can't pick them up automatically.
There are four ways to enter.
1. Follow this blog. If you already follow me, leave a message on this post telling me that.
2. Leave a comment on this post. Any comment. Tell me what you're going to have for dinner, what your favorite book is, how your spring garden is taking shape.
3. Sign up for Swag Bucks under my referral link. If you don't know what that is, see this post. If you've already signed up under my referral link, just leave a message letting me know.
4. Blog/Tweet about this giveaway. Come back here and leave a link to the blog or tweet.
Giveaway is open until Friday, Feb. 25, 2011 at 12:00 noon PST. Winner will be announced Saturday, Feb 26th and chosen via a random number generator. Giveaway open to all - including overseas readers.
With much gratitude in my heart for all of you,
Simple Mama
Monday, February 21, 2011
I Am An Urban Homesteader!
Recently the inter-webs have been abuzz with news that the Dervaes family of Pasadena has successfully trademarked the terms "Urban Homestead" and "Urban Homesteading". The family sent out at least 16 "cease and desist" letters to various groups asking them to find alternate phrasing, including the Santa Monica Public Library for hosting a free, educational event on urban homesteading.
These terms can no longer be used in Facebook page titles, on personal blogs or otherwise for profit. If you use the term in a not for profit manner, you must use the trademark symbol and "specifically identify products or services from the Dervaes Institute." They add that it would be "proper to use generic terms such as "modern homesteading." They have had Facebook pages with the terms Urban Homestead and Urban Homesteading in the name shut down without notifying those pages first. -Take Back Urban Homesteading Facebook Page
Hmmm.
And the word is the Dervaes family went after these guys too: The Urban Homestead: Your Guide to Self-sufficient Living in the Heart of the City. A legal battle appears to be brewing with that one. You can read about it here.
The Dervaes family claims it sought these trademarks, among others, to protect their intellectual property. I would argue that the intellectual property they claim needs protecting is actually open source. While what the Dervaes family has done with their little plot of land is admirable, it certainly isn't original. People have been putting these agricultural and environmental practices to use for decades, if not longer. Going after the little guys seems to me to be counter productive to the movement they claim to want to inspire. To claim "intellectual property" on words that have been used together since at least the 1970's is a slap in the face to all the homesteaders, urban and suburban gardeners, back yard chicken keepers, and food preservers - really anyone that tries to employ sustainable, self sufficient living styles in the city (or in my case, suburbia).
Head over to the Facebook page, Take Back Urban Home-steading and show your support for a community that is tight knit and would strive to keep Urban Homesteading an open source idea and lifestyle. There you can find out what else you can do to help
In the meantime, enjoy a few scenes from our suburban homestead.

Ladies Lunching

Two Weeks

Vanilla Pears

Starting From Seed
Growing hope, one seed at a time.
Simple Mama
These terms can no longer be used in Facebook page titles, on personal blogs or otherwise for profit. If you use the term in a not for profit manner, you must use the trademark symbol and "specifically identify products or services from the Dervaes Institute." They add that it would be "proper to use generic terms such as "modern homesteading." They have had Facebook pages with the terms Urban Homestead and Urban Homesteading in the name shut down without notifying those pages first. -Take Back Urban Homesteading Facebook Page
Hmmm.
And the word is the Dervaes family went after these guys too: The Urban Homestead: Your Guide to Self-sufficient Living in the Heart of the City. A legal battle appears to be brewing with that one. You can read about it here.
The Dervaes family claims it sought these trademarks, among others, to protect their intellectual property. I would argue that the intellectual property they claim needs protecting is actually open source. While what the Dervaes family has done with their little plot of land is admirable, it certainly isn't original. People have been putting these agricultural and environmental practices to use for decades, if not longer. Going after the little guys seems to me to be counter productive to the movement they claim to want to inspire. To claim "intellectual property" on words that have been used together since at least the 1970's is a slap in the face to all the homesteaders, urban and suburban gardeners, back yard chicken keepers, and food preservers - really anyone that tries to employ sustainable, self sufficient living styles in the city (or in my case, suburbia).
Head over to the Facebook page, Take Back Urban Home-steading and show your support for a community that is tight knit and would strive to keep Urban Homesteading an open source idea and lifestyle. There you can find out what else you can do to help
In the meantime, enjoy a few scenes from our suburban homestead.

Ladies Lunching

Two Weeks
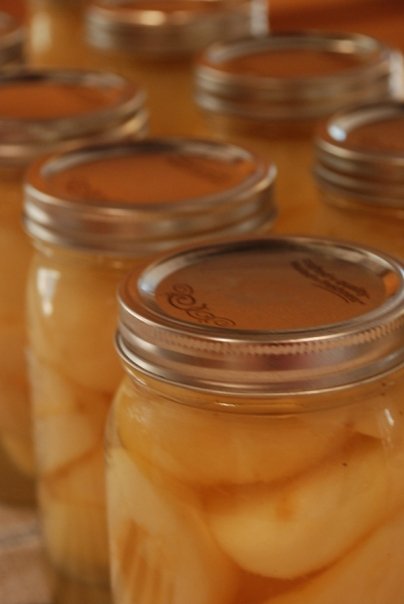
Vanilla Pears

Starting From Seed
Growing hope, one seed at a time.
Simple Mama
Friday, February 18, 2011
{{This Moment - The Boy and his chicken}}
{this moment} - A Friday ritual inspired by Soulemama A single photo - no words - capturing a moment from the week. A simple, special, extraordinary moment. A moment I want to pause, savor and remember.


My Truth
I've been feeling irritated as of late. Like I just can't keep it all together. Perhaps it's The Boy who has come down with his 989th cold of the season. Perhaps it's the dreary weather we've been having. Maybe it's our own lack of daily rhythm since we've returned back from vacation.
You see, here's the thing Internet. As much as I would like to portray myself to the world as a Super Mom, I'm simply not able to keep up. I'd like to don my cape and fight wayward laundry and dirty dishes all the while creating a charming craft, keep my Etsy store stocked and create a nutritious and healthy meal from scratch for my family each evening. But this is my truth:

And there's more where that came from. Photos I'm not willing to share yet, lest you feel the need to contact CPS about the state of my dirty home. Laundry unwashed. Floors unswept. Beds not made. And don't even get me started on the garage.
And here's a secret. Sometimes, when I need to take a picture for my blog - I simply move the mess from one spot to another. You know. To give the appearance of a spotlessly clean space!
Fellow bloggers, I'm in need of some support. And maybe even a little truth telling of your own. Are your homes really as neat and tidy as you portray them? Do you really bake that bread every day from scratch? Is your craft area neatly organized and labeled? Do you truly make your beds every. single. day?
Because I don't. And I'm feeling the guilt of a stay at home mama who doesn't really have it all together. Breakfast this morning? A sliced pear, Crystal Lite, and left over Mac and Cheese. There. I said it. I did not make pancakes, french toast, or steel cut oats for breakfast today.
I'll still use this space to journal all the beautiful things in my home, my family, my life. I don't need a daily visual reminder of the chaos that all too often resides in my kitchen or laundry room on the internet. When I'm old and gray (actually I'm already gray) I'll want to be able to use this space and focus on all the things I got right. The crafts, the love, the trips, the memory making, the attachment parenting. But I'm feeling a little raw today. A little undone by those dishes sitting in my sink and my own lack of motivation to wash them. I'd rather sit on the couch with The Boy and read.
Simple Mama
Wednesday, February 16, 2011
Why Don't You Make Coffee Filter Flowers

I'm longing for spring. For an end to the gray, misty mornings. An end to the drizzle and cold. For a while it seemed as though mother nature was going to oblige. Temperatures crept up into the 50's. Crocus and other early bulbs started to show their green tips. And then BAM! This morning we woke up to snow. (Insert grimacing face here.)
To brighten our days we've been making coffee filter flowers. We used to make a variation of these when I was a child, but recently I stumbled across Aunt Peaches coffee filter flowers and I was inspired. Our version is slightly different, so I'm going to post a tutorial here - but make sure you stop by her blog and take a look at the creations she makes. They are outstanding!
You'll need:
5 white coffee filters
Food coloring
Wooden skewers
Florist Tape
1/2 cup water
A small shallow pie pan
We started our project late one evening on "Family Craft Night." I've recently been asked when family craft night is, as it seems we're always crafting. To be dubbed "Family" craft night, the event must take place in the evening when Super Hubby is home and said Hubby must participate in the craft. :) But I digress.
This is a great project for little ones and big ones alike. To start, take your pie pan and fill it with 1/4 cup water. Add food coloring. For this tutorial, I'm going to show you a gradiated flower. We began with 2 drops of yellow food and two drops of red food coloring. Place a stack of coffee filters in the water and let them soak for a few moments. We soaked between 10-15 filters at a time. I should add that if you don't want your hands to turn funky colors you might consider wearing rubber gloves. We didn't and we all have awesome orange and red hands.

Wring the coffee filters out and lay them on some old towels to dry over night. Add a few more drops yellow and red food coloring to your water so the color is more concentrated. Soak more coffee filters. Lather, rinse and repeat with a 3rd set of coffee filters and more food coloring.

See the difference in coloring?
Take two of your lightest shade, two of the medium shade and 1 of the darkest shade and set them aside. Each flower is made from 5 coffee filters. Begin with the darkest coffee filter. Fold it in half to form a half circle. Fold it in half again to create quarters. Fold it in half one more time to create 8ths and then one more time for 16ths. The medium colored coffee filters are folded into 8ths. The lightest coffee filters are folded into 4ths. Clear as mud, right? Take a look at the photo.

Using your scissors, cut teeny, tiny jagged petal shapes into the darkest coffee filter. This forms the center, or stamen of your flower. Cut larger petal shapes into the medium colored coffee filters. Create wavy scalloped shapes for the lightest shades.

Snip the very end off of each triangle shape on the folded side, or very center of the coffee filter. This creates a tiny hole in the middle of each filter:

Take your darkest filter and place your wooden skewer through the center hole. Move it up the skewer til it's about 3/4" from the top of the skewer. Gather the base and twist it around the skewer. Using florist tape, wrap it around the base of the coffee filter so that it sticks to the skewer. Florist tape is sticky, but must be stretched slightly to activate the good gummy stuff. Don't stretch it too much or it will break.

Next, add your first medium color coffee filter. Twist it just as you did the first filter and tape it up:

Repeat this process with the second medium coffee filter and then finally with the 4th and 5th lightest coffee filters:

Once all 5 filters are on your skewer, continue wrapping your florist tape all the way down the length of the skewer.

I did manage to snag pictures of the finished flowers outside. I just couldn't take photos of the actual works in progress because it was too wet and cold to work outside with the delicate coffee filters. I love the subtle graduated color.

Yellow Gradiated Flowers:

So sunny and cheerful!

And of course you can make these flowers with any color coffee filters you wish - we made some in about every color of the rainbow. The more dye you use, the darker the filter will be after it dries.

Here they sit on our nature table. Yep. I'm trading in seasons early. Manifesting an early spring just like the ground hog said we would have!

It's our own version of forcing bulbs indoors. :)
Cheers,
Simple Mama
Monday, February 14, 2011

Sunday, February 13, 2011
Why Don't You Make Potato Stamp Valentine's Day Cards

We needed a last minute Valentine's Day card craft for Super Hubby. He had already seen our celery stamped rose cards. Doily heart cards were so last year. Store bought cards seemed impersonal. What's a mama to do when her creative juices are running low?
Why pull out the old potato stamp trick, of course.
You'll need:
Card Stock Paper
Paints (We used tempera)
A medium potato
A heart shaped cookie cutter
A small, sharp pairing knife.
Begin by cutting your potato in half near the widest portion. We used a potato that was just past its prime - starting to grow eyes:

Using your small heart shaped cookie cutter, insert it into the potato until the top is flush with the flat end of the potato:

Adults, using a small sharp pairing knife, cut into the potato about 1/4 of an inch down until you feel your knife touch the cookie cutter. Continue cutting all the way around the potato until the waste is easily removed.


Make sure your paint is thinned enough that when you're stamping, it doesn't come out like a thick glob. Likewise, make sure it isn't so thin that it just runs off your stamp. You may need to play around with adding just enough water to the paint.
We used a regular piece of 8.5x11 card stock, folded in half twice to make a card. I gave the potato stamp to The Boy and allowed him to go crazy. We started with bright red paint. Stamped a few hearts, and added some white to make pink. This way we only dirtied up one bowl.

Just like with the celery stamping, make sure to press your stamp firmly on the paper, but don't rock it back and forth too much.


This makes a great last minute Valentines Card. Make it early enough in the day that it has time to dry. In a pinch you could speed up the paint drying process by aiming a low heat hair dryer at the card.
And Super Hubby, if you're reading this, act surprised tomorrow when The Boy gives you his card.
Happy card making!
Simple Mama
Friday, February 11, 2011
This Moment - Preserving Lemons in Salt
{this moment} - A Friday ritual. A single photo - no words - capturing a moment from the week. A simple, special, extraordinary moment. A moment I want to pause, savor and remember. Inspired by soulemama


Thursday, February 10, 2011
Why Don't You Make Acorn Cap Jewels

It's no secret, we're big on acorns around here. I use them frequently in my Etsy store, Green Baboon Designs. We decorate with them during the seasons. The Boy uses them as "food" in his play kitchen. Yesterday we found another use for them - shiny acorn cap jewels.
You'll need:
Acorn caps
Elmers School glue
Markers
Rice, beans, playdough, etc - something to hold your caps secure.
Pick out your favorite acorn caps. We have an abundance on hand at any given time, collected from our outings to our favorite parks and forests in the autumn. Make sure the insides of the caps are free from dust and debris.
Using your markers, color the inside of each cap. If you want a bright, jewel tone for your finished acorn cap, color the entire inside leaving no space blank. If you want a pastel shade, don't press as hard, or worry too much about getting every little space covered:

(Yes - he's wearing the same shirt two days in a row. I sent him upstairs this morning to pick out his clothes and get dressed and this is what he came back down in.)
Once your acorn caps are all colored, place them in your rice, or beans, or play dough. We have rice that we're careful to only use with our crafts.

It's hard to see the marker, but it's there. It will be more noticeable once we're done.
Fill each acorn cap up to the rim with white school glue. We used Elmers.

Allow your acorns to dry over night. Ours needed close to 20 hours to dry completely.
When the glue dries it forms a hard enamel like coating over the colored part of the acorn cap, allowing the color to really shine through. The Boy called them acorn treasures. He's big into pirates, treasure, and all things jewel like.

We're using our jeweled acorn caps to play Memory. We made sure to make 4 of each color. We turn them over and take turns lifting two caps each until a match is made. The person with the most matches once all the caps have been turned over wins.
I foresee a batch of acorn rainbow "soup" in my future as well.
Cheers,
Simple Mama
Why Don't You Make a Valentine's Day Lei?

As The Little gets older, we try to create something together at least twice a week. I admire all you bloggers who manage to create something every single day. I just can't seem to find a way to balance everyday toddler crafting into our routine.
We planned a project that ended up being too big for the reality of our day this afternoon. After a morning play date with some of my favorite mamas and their children, a missed nap, and no dinner ready I decided to switch gears and go with something much simpler.
We made Valentine's Day inspired Leis to wear.
For this project you'll need:
Several plastic straws (Gasp! Plastic! I know! Yet even in our house, we're we've tried to rid ourselves of plastic we still keep straws on hand).
Card stock paper in various colors
Scissors
Hole punch
Twine, hemp rope, thin ribbon, or the like

Cut your rope/twine/ribbon into a length long enough, that when tied off at the ends, it will slip easily over your head. Using scissors, cut your straws into small lengths. Ours were about 1 inch in length.

String one of the straw lengths onto your twine. Tie off at the end so that it doesn't slide off and you can continue stringing.
Cut out hearts in various sizes. My son opted for bright, non-Valentiney colors.

Using the hole punch, punch a hole at the top and the bottom of each heart. String your twine through the top and then the bottom of a heart.

Begin alternating a straw length and a paper heart until your twine is full. My son loved stringing the straws on.

When you're finished, tie the two ends together and slip it over your head. You now have your very own Hawaiian inspired Valentine's lei.

Happy creating!
Simple Mama
Subscribe to:
Posts (Atom)